Wednesday, June 16, 2010

CELEBRATE!!

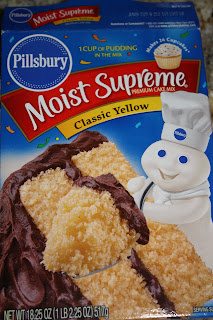
This Saturday is my birthday and I have a class full of 20 first graders who are more excited about my upcoming birthday then they are for their own! Every year I make some sort of treat for my class because really, I am always looking for a reason to bake. This year was a bit more challenging with us moving and spending every waking moment packing. ((Okay, I am being a bit dramatic, but sometimes that's what it feels like!)) I decided I would be resourceful and go to the handy dandy cupboard of quick bakes! I generally keep a couple cake mixes on hand, a brownie mix or two, a tub o' frosting and a few other goodies. I settled on yellow cake mix and white frosting because I knew that truly my options were endless. So here is what I had


After I mixed according to the directions on the box, I separated the batter into three separate bowls and started adding food color.

**Oh and side note, these soup spoons are the perfect size for filling cupcake liners!**

Then once that was done I started filling the cupcake tins layering the colors.


Bake, frost and you're done! I don't have a "finished product" picture but trust me, the frosting just didn't compare to the cute cake. That's what I get for using canned frosting!! =)

Sunday, June 13, 2010

Chocolate Chip Cookie Dough Brownies

Ok, I'm warning you...DON'T MAKE THESE! Seriously, unless you have a large number of people to give them away to, this is not a dessert for the weak! I made these last night for a girls get together today. I began cutting them and there was one that just wasn't "pretty enough" to put on the tray. ((imagine that...a dud!)) So, I cut a sliver off of it, just to TASTE, and immediately I was hooked. Needless to say, that sliver turned in to half, which turned in to 3/4. I left the last little piece on the counter which I'm sure will miraculously disappear someway or another =)

Here's what you need:
A box of brownie mix (any kind will do)
A box or bag of cookie mix
A stick of butter
3/4 cup heavy whipping cream 
a bag of semisweet chocolate chips

First, to make the chocolate chip cookie dough brownie prepare the brownie mix as it says to do so on the box. Next pour into a 13x9 greased pan (and by greased I mean I just sprayed a ridiculous amount of cooking spray . Then, mix up the cookie dough according to the directions on the package. Use a spoon and place spoonfuls of cookie dough right into the brownie mix in the pan. You can use the spoon to press the cookie dough in to the pan a little bit if you'd like. Bake at 350 for about 35 minutes or until the middle is completely set.


Take the brownies out of the oven and allow to cool completely. Once they're cooled you can make the ganache. Ganache sounds all fancy schmancy, but really is very easy. Combine the butter and whipping cream in a small sauce pan over low to medium heat. Cook until right before the mixture begins to boil. Pour your chocolate chips in to a bowl and then you can pour your heated goodness right over the chocolate chips. Give them a minute or so to get acquainted in the bowl before you begin to stir. Mix them until it makes a smooth and shiny. You can then pour the ganache over the brownie and smooth with a spatula. I placed my brownie in the fridge over night. This made it super easy to cut through and plate.

 And here is the finished product. They really should come with a warning label!

Sunday, May 30, 2010

Dark Chocolate Macaroons

For Mother's Day I decided to make cookie arrangements for the women in my life. I then thought I needed to do something special for my mamacita. I knew that one of her fav's is dark chocolate macaroons. I searched for the perfect macaroon recipe and decided on this one from the Barefoot Contessa (I ♥ her!!). They were so moist and yummy! I would definitely use this recipe again!
  • 14 ounces sweetened shredded coconut
  • 14 ounces sweetened condensed milk
  • 1 teaspoon pure vanilla extract
  • 2 extra-large egg whites, at room temperature
  • 1/4 teaspoon kosher salt

Directions

Preheat the oven to 325 degrees F.
Combine the coconut, condensed milk, and vanilla in a large bowl. Whip the egg whites and salt on high speed in the bowl of an electric mixer fitted with the whisk attachment until they make medium-firm peaks. Carefully fold the egg whites into the coconut mixture.
Drop the batter onto sheet pans lined with parchment paper using either a 1 3/4-inch diameter ice cream scoop, or 2 teaspoons. Bake for 25 to 30 minutes, until golden brown. Cool and serve.

I then drizzled Extra Dark Guittard Chocolate over each one. I doubled this recipe too (you can just never be too sure) and ended up with extra macaroons. I put the extra baggies of cookies in the freezer and they froze rather nicely. I just pulled a bag out 2 nights ago when I had a sweet tooth (when don't I) and they tasted just as good as the day I made them!

It's BABY Season!!!

I have been dying to use my onesie cookie cutter so when the opportunity came about, I was all over it! Hopefully someone will have a baby girl soon so I can make some pink ones!!


Fight for a CURE

Mother's Day has marked a tradition in my family where the women all head out to the USC Coliseum for the Revlon Run/Walk for Women. We raise money for the cause starting at least a month before the walk. Every year, my mom and I send out a thank you to all that donate. This year we decided to do something a little different. Since I have been having SO much fun making cookies, we decided to do a teal ribbon for ovarian cancer. Unfortunately I haven't mastered the skill of sending cookies in the mail ((this is something I am working on now!!)) ((Sorry to anyone who didn't get one. I OWE YOU!!)) so I was only able to pass out cookies to those I see on a regular basis. I also took this opportunity to teach my mom and sister how to make these cookies. I figure, hey! why not have a few extra hands to help =)

Tuesday, May 11, 2010

Take Me Out to the Ball Game....

Aww, nothing says summer like baseball. Well in this case, little league! Here is a cookie I just completed. As simple as these look, piping a circle can be quite hard. I think the trick is to not over think it. =)


Sunday, May 2, 2010

Cupcake Rice Krispie Treats

Last week was secretary's week ((oops!!)) I wanted to bake something for the lovely ladies in the office but the house was warm and I really didn't feel like turning on the oven. So, I started surveying the cupboards and realized I had everything needed to make rice krispies (props to grandma for always sending me back up to Sacramento with rice krispies and marshmallows in my suitcase. haha airport security probably gets a chuckle out of the many odd items I bring back with me!!) I knew I couldn't just make boring old rice krispie treats to so my bucket o' cookie cutters I went. I decided on cupcakes. I have a bag of chocolate metables in the fridge, left over royal icing from the Teacher Appreciation Cookies, and I always have sprinkles on hand. Here is the final product. I would definitely use white meltables next time. I think they would have been MUCH cuter!

Teacher Appreciation Week

This upcoming week is teacher appreciation week. I know, as a teacher, how great it feels when you have a parent come to you and thank you for all you do with for their children. Here is a cookie order that I just delivered. They are sparkly stars with a tag that reads "some days teachers are the ones who deserve the gold stars"


Monday, April 26, 2010

Our Favorite "Guilt Free" Weekend Breakfast

I discovered a fat free muffin that is really quite good. I have only ever found them at Winco, but I'm sure that once you find them you won't be disappointed.

While the muffins are good on their own, I knew they could be SO much better. I made a "crumble" for on top. I sort of eyeball it but it consists of about 1 cup sugar, half cup brown sugar, as much cinnamon as you'd like, a tablespoon of flour and 1/2 tablespoon better which ends up making each muffin less then .5 grams of fat per muffin. If you choose to, you can add a little more butter and it makes the tops crispy. SUPER yummy! I combine all "crumble" ingredients in a bowl and squish them with my fingers. I tried the whole "cutting" technique with 2 knives and I tried using a fork but ultimately I like the result I get with my handy dandy fingers.

I then spoon a spoonful of the crumble on the muffins before baking. I also don't use cupcake liners in my pans when making these because it seemed like they stuck every single time. Such a waste of a good muffin when you have to spend your Saturday morning peeling little tiny pieces off of the liner. 

Here is the finished product. I used just half tablespoon butter on these so they didnt get crunchy on top...just crumbly.


Saturday, April 24, 2010

Mom-in-law's 65th birthday gift!!

So this project wasn't in the kitchen but I had a BLAST putting it together. My MIL was hitting the big 65 today and Joe and I were at a loss as to what to get her. So, trying to think outside the box, I decided to make her a "Senior Citizen Survival Kit". I knew that she would enjoy the laugh and get a kick out of it. Here's what it included:
  • A big pair of clown glasses~to help you see things far away
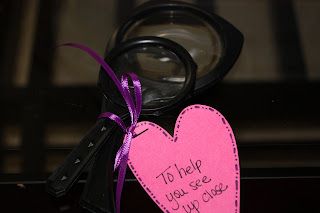
  • Magnifying glass~to help you see things up close
  • A bag of rubberbands~to give you flexibility
  • Starbursts~for a "BURST" of energy
  • Tylenol~for your aches and pains
  • A fan~to keep you cool
  • Fiber bars~to keep you "going"
  • A bag of kisses~because we love you
  • A jar of baby food~to help you adjust to softer foods 
  • Toothpicks~to keep your eyelids open after 7:00 pm
  • Denture cleaner~for that dazzling smile
  • Red hots~to put the fire back into your life
  • A whistle~for when you've fallen and can't get back up
  • A fly swatter~to keep away the things that bug you
I labeled each item and put it in a shoebox sized tote (all except the fly swatter, it didn't fit) and decorated it with shapes and letters I cut out with my Cricut. I then tied a big bow around the whole thing. Here are the pictures I took of each item. I forgot to take a picture of the fly swatter and didn't realize it until after I had put it in a gift bag and stuffed it with tissue paper. Oh well.

Barbeque Chicken Sandwich

Tonight I decided to make BBQ Chicken Sandwiches for dinner but wanted to do something different. Neither Joe or I are big chicken fans so I knew I would have to do something spectacular to spice it up. As I began searching online I came up with the perfect sandwich. I needed, rolls, chicken, cheese, BBQ sauce avocados,
onion, turkey bacon, buttermilk and a few other ingredients I could find in my pantry.((Sorry, I didn't take pictures throughout the process so you will have to forgive the after pictures with missing pieces!!))

I started by slicing an onion on my mandolin so they were super thin. I then placed them in a bow and covered them in low-fat buttermilk making sure all the onions were covered. Next I cooked the turkey bacon. Then I sliced the chicken down the middle to make it thinner. I then used Emeril seasoning (because it was the first thing I saw in the cupboard) on both sides of the chicken. I cooked the chicken the in the same pan I cooked the bacon in. When the chicken is finished cooking place slices of cheese on top. We choose colby, but you can use whatever type you like.

                   
While the chicken was cooking I smooshed up 3 avocados (probably could have gotten away with just 2) and got my oil ready to go. (I used a candy thermometer so I knew when the oil reached 375.) I probably should have started the oil a little earlier so it was hot and ready to go. Oh well, it all worked out. When the oil was ready I took the soacked onions out of the bowl and put them in a larger bowl that had 2 cups flour, 1 tablespoon, salt, and pepper and chili powder to taste. I made sure to fully dredge the onions and then placed a few at a time in to the oil.
                      These are the finished onions "crispies"
 It was then time to assemble the sandwiches. We toasted the bread, lathered both sides with barbecue sauce followed by avocado, a piece of chicken, a handful of onion crispies and a couple pieces of turkey bacon. 


Tah-Dah!!! I must say this was probably the best chicken sadwich I have EVER and at home or at a restaurant!!

Thursday, April 22, 2010

Pioneer Woman Maple Cinnamon Rolls

On Monday I checked in on good ole Bakerella and she had made some mouth watering cinnamon rolls that she had seen on Pioneer Woman's website. I wanted to make them but really had no good reason to make them other then the immediate growl in my stomach that began once I started scrolling through the pictures on their blogs. So, when I found out my brother and sister were heading down to LA I headed out to purchase everything I needed for the cinnamon rolls to be delivered to family down south! Ahhh...PERFECT! I could make the full recipe on Pioneer Woman's website and keep just one little pan here for Joe and I. I must say they came out DELICIOUS! The maple icing really sets these apart from regular cinnamon rolls!

I was a bit bummed at first because, as I often do, I read through the directions once and just got to it. I skipped the part about letting the rolls rise before putting them in the oven to bake. In my opinion they came out a bit flat and unattractive but what they lack in looks they make up in taste. I would DEFINITELY make these again!!

Sunday, April 4, 2010

Happy Easter

Today for Easter we are heading to my brother and sister-in-law's house. We decided on Grandma Jean's chicken salad ((YUM)) which I made last night because it always tastes better the next day and I made a cheesecake for dessert. The cheesecake was super easy! I of course got the recipe from Martha. Here is the link Raspberry Swirl Cheesecake. I didn't have any raspberries in the house but I did have a bag of frozen mixed berries so I just used those.
 Here is a picture of the basket that the Easter Bunny left for Joe...
Wishing everyone a wonderful Easter!!

Thursday, April 1, 2010

Bake-a-thon!

Yeah for spring baking!! I got my first order for cookies so that started the extravaganza. A friend from work ordered Easter cookies that she actually was going to use as place cards ((such a cute idea))
So, since I was already baking I decided to make cookies to send to my family and friends in Southern California.
...and while those were drying I made chocolate covered oreos for work
but then I remembered I had a breakfast potluck on Friday and decided to bake a lemon coffee cake.((emailed to me by my friend Martha....yes Stewart!!))
It called for an angel food cake pan which I didn't have. So, thanks to mom and her clever ideas, I used a cake pan and placed an empty can in the center. I filled the can with dried beans so it would stay in place. I must say, it worked REALLY well!!

Add to this a triple batch of dog treats and I am all baked out!!

Tuesday, March 16, 2010

St. Patty's Day

My classroom had a nice little visit from Brian O'Mally the leprechaun today before leaving school. He walked all over the ceiling leaving leprechaun footprints scattered about, left a note on the whiteboard and decorated the classroom in green. Ahh now THIS is what I love about teaching first grade!!

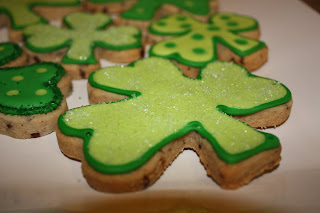
Over the last couple days, I have been working on some St. Patrick's Day cookies for work. I used a sugar cookie that I LOVE and decided to add ground up chocolate chips to it. I don't know if I would do this again unless someone requested it. It really didn't taste all that different. Here is the finished product


So, then on to the cupcakes for my class. Originally I was going to dye the cake batter green, but I used most of my green food coloring on my cookies. So, I used a boxed white cake mix. I went with applesauce instead of oil because I had applesauce left over from my Lemon Cake. Once the cupcakes came out of the oven I waited for them to cool and piped green buttercream frosting into each cupcake. I then topped it off with white buttercream frosting and a few green sprinkles.

Tah-Dah!! I think I can say I am ready for St. Patty's Day! =)

Monday, March 15, 2010

Lemony Goodness!!!

Oh my gosh...I think I have found a recipe I will make for years. I made it a couple months ago for a friends birthday and fell in love with it. This past weekend I decided to make a lighter version of the cake and I think it was even better!! Here's the recipe: 

1 box of lemon cake mix. I actually used yellow cake mix this time because it's what I had it in the house and it was just as good. 
2 3oz packages of lemon flavored gelatin, 
1 3.4 oz box of instant vanilla pudding
1 8oz container of frozen whipped topping thawed (I used fat free)
1 cup milk (I used fat free milk too!)
1/3 cup applesauce
3 eggs

You can bake the cake according to the directions on the back of the box if you'd like. I decided to go for the lighter version and I used 1 cup water, 3 eggs and 1/3 apple sauce instead of what it called for on the back of the box. Bake at whatever temperature the box tells you. The cake mix I bought told me to bake at 350.

While the cake is baking start to make the cool whip topping. Mix the pudding and one box of the lemon gelatin with 1 cup milk. Make sure it's mixed really well before folding it into the cool whip. Return to the fridge until you're ready to frost your cake.

When your cake comes out of the oven, poke it all over with a fork. (I get a little crazy with this!!) 

In a bowl mix 1/2 cup hot water, 1/2 cold water and the remaining box of gelatin. Mix until the gelatin is completely dissoved. When dissolved, spoon the liquid over the cake. It will seep into the holes you made with your fork. Let your cake cool on the counter until you're able to pick up the cake pan without burning your fngers. At this point you can put the cake in the fridge to cool completely.

Once the cake is cooled you can frost your cake with the cool whip topping you made earlier. 

I like to make my cake the morning before I need it because the longer it sits in the fridge, the better it seems to taste. I had the last piece of the cake tonight, 2 nights later, and I think it tastes 10 times better then the first piece. 

 Enjoy!!

Sunday, March 7, 2010

Cake Cookies

These days I eat, sleep, and breathe cookie ideas. I seriously go to bed at night and I lay there thinking about different cookies I can make. So once I get one in my head, I HAVE to make it! I have been wanting to make a birthday cake. What I pictured was a 3 tiered, "chunky" cake.  I was at a bake shop near my house and I found a 4 tiered wedding cake cookie cutter. Not exactly what I was looking for but I figured it would work to play around with. 
 I'm not completely thrilled with how they came out but it was fun and I got to play with a few different tips!

Tangerine Martinis

This was the perfect drink for a night in with fajitas! For the drink you need, 3 tangerines, 2/3 cup cranberry juice, 1 cup water, 1 cup sugar, 1 1/2 cups vodka and either 1 lemon or 2 limes.

First, you squeeze the juice from the tangerines into a saucepan and then throw the skin from the tangerines in too! Add the sugar and the water and bring to a boil over medium heat. Once it starts to boil, let it simmer for about 5 minutes. Remove and strain into a container that will fit in your refrigerator. Let it sit in your fridge until it's chilled. 

I then decided to put everything in to a pitcher so I could just shake what I needed.  So I added the tangerine simple syrup, the cranberry juice, vodka, and the juice of either one lemon.. Stir and when ready pour in to a shaker over ice, shake away and serve. 


Sunday, February 28, 2010

Madison Turns 4!!

This Wednesday is Madison's 4th birthday and as crazy as this may sound, I make something special every year for my dog's birthdays. This year, since I have been on a cookie craze, I decided to make her birthday cookies. I decided on a pretty basic dog treat recipe and to top it off I had everything I needed already in the house. The recipe called for 2 cups whole wheat flour, 1 tbsp Baking Powder, 1 cup peanut butter and 1 cup milk. I doubled the recipe though so there were enough treats to share. 
I make dog treats pretty often, so I wanted to do something special. I decided on a sandwich cookie and pulled out my shortbread cookie cutters. Then I needed to find something dog friendly to fill the middles with. After doing some research I found that I could use royal icing. Done!
While I waited for the cookies to cool, I colored my icing pink and yellow and was ready to start sandwiching!
I spooned about 1/2 tsp royal icing on to each cookie and smooshed them together. 
I put them into cellophane bags to share with their friends and tied them with pink and yellow ribbon. 


The last step was a taste test...SUCCESS!!

Saturday, February 27, 2010

Beans and Memories!!

Joe and I decided that tonight would be a perfect night to grill some carne asada. I headed to the grocery store for a few things, which included MY HUSBAND'S (still wierd) favorite refried beans. They are a dried, "just add water" sort of bean but he LOVES them!! They definitely taste more like homemade refried beans then the ones you can find in the can.


As I was on the "Mexican Food" aisle I spotted what I remember to be as the most purchased thing from the ice cream man in 1994! I saw them, my mouth watered and I threw a bag of them in to my cart.
Of course in true Kim fashion, I opened one before even leaving the parking lot. I must say, they aren't what I remember. I actually thought to myself, "why in the world did I ever eat these?" As disappointed and I was with my purchase, I just couldn't bring myself to throw them away. Maybe try again tomorrow? Were my taste buds off?? =)